Creating a New Architecture App
This documentation is still experimental and details are subject to changes as we iterate. Feel free to share your feedback on the discussion inside the working group for this page.
Moreover, it contains several manual steps. Please note that this won't be representative of the final developer experience once the New Architecture is stable. We're working on tools, templates and libraries to help you get started fast on the New Architecture, without having to go through the whole setup.
This page will help you create a new React Native app that uses the New Architecture.
Development Environment
Before continuing, make sure you've followed all the steps in the Setting up the development environment section under the React Native CLI Quickstart tab.
If following the setup guide, stop when you reach the section Running your React Native Application, and resume following this guide.
If you're using Expo, you can't enable the New Architecture at the moment and will have to wait for a future release of the Expo SDK.
Creating a New Application
If you previously installed a global
react-native-clipackage, please remove it as it may cause unexpected issues:npm uninstall -g react-native-cli @react-native-community/cli
If you already have your development environment set up, create a new React Native project from the template:
npx react-native@latest init AwesomeProject
The New Architecture is available in React Native version 0.68 or later.
Configuration
Follow the steps below to enable the New Architecture and build the app.
Enable Hermes
Hermes is an open-source JavaScript engine optimized for React Native. Hermes will be the default engine in the future, and we highly recommend you use it.
Please follow the instructions on the React Native website to enable Hermes in your application.
Enable the New Architecture
Target OS
- Android
- iOS
Navigate to the ios directory and run the following:
# from `ios` directory
bundle install && RCT_NEW_ARCH_ENABLED=1 bundle exec pod install
Then build and run the app as usual:
yarn ios
You will need to run pod install each time a dependency with native code changes. Make this command easier to run by adding it to scripts to your project's package.json file:
"scripts": {
  "pod-install": "RCT_NEW_ARCH_ENABLED=1 bundle exec pod install"
}
and run it with yarn pod-install. Note that bundle install does not need to run a second time, as long as the Gemfile has not changed.
Troubleshooting
react-native run-ios fails
If you see a build failure from react-native run-ios, there may be cached files from a previous build with the old architecture. Clean the build cache and try again:
- Open the project
ios/project.xcworkspacein Xcode - In XCode, choose Product > Clean Build Folder
- In the project directory, remove the
ios/Podfile.lockfile andios/Podsdirectory:rm -rf ios/Podfile.lock ios/Pods - Re-run
yarn pod-installandyarn ios
Set the newArchEnabled property to true by either:
- Changing the corresponding line in
android/gradle.properties - Setting the environment variable
ORG_GRADLE_PROJECT_newArchEnabled=true
Then build and run the app as usual:
yarn android
You may notice longer build times with the New Architecture due to additional step of C++ compilation with the Android NDK. To improve your build time, see Speeding Up Your Build Phase.
Confirming the New Architecture is in Use
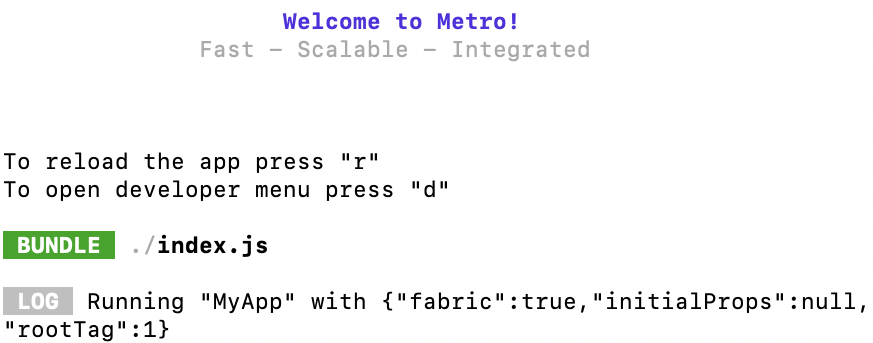
After you build and run the app when Metro serves the JavaScript bundle, you should see "fabric": true in the Metro logs:

Want to Know More?
If you'd like to view the code changes relevant to the New Architecture, take a look at the upgrade helper from version 0.67.4 to 0.68.0. Files that were added for the New Architecture are marked with a yellow banner.
For further explanations of what each file is doing, check out these guides to walk through the changes step-by-step: Enabling The New Architecture in Your App